VMAP
What is VMAP?
VMAP is the acronym to Video Multiple Ad Playlist and it enables users to define ad breaks within content that they do not have much control over. With VMAP you could specify the exact time of each break, the number of breaks, and how many ads should serve within each ad break.
SpringServes implementation of VMAP features:
- The ability to generate VMAP tags in a straight forward and user friendly way.
- Ad Pod tags are added to the VMAP and serve as the commercial break. There is no single ad supply tag support in VMAP.
- Ad pods can be added at the exact time (hh:mm:ss) or a specific percentage point in the content along with pre-roll and post-roll support.
- The duration of each ad break is customizable in the individual ad pod settings.
- The maximum number of ads and their duration is also customizable in the ad pod settings.
- All SpringServe Macros are supported in VMAP.
- VMAP ad breaks tap into all of SpringServes demand including Direct Connect.
How does VMAP work?
Contrary to what most people think of a schedule, VMAP does not queue up ad files, prompt the delivery of particular ads, or tell the video player to do anything. Instead, it simply gives the video player the information it needs to know where you want ads to appear during content playback. It designates where ads can be placed (by specifying location and number of ad breaks), how many ads can be placed, and what types of ads can be displayed for each spot. All of this information is relayed to the video player in an XML template, which the video player then reads.
How do I create a VMAP Schedule?
If your account is enabled to create Ad Pods, then it automatically has VMAP capabilities. In the supply section of the platform, you will see a tab named 'Pod Schedules' where you could build a schedule and generate a VMAP tag. Before building out a schedule, make sure you have enough Ad Pod supply tags to fill the ad break spots. For more information on how to create ad pods go here.
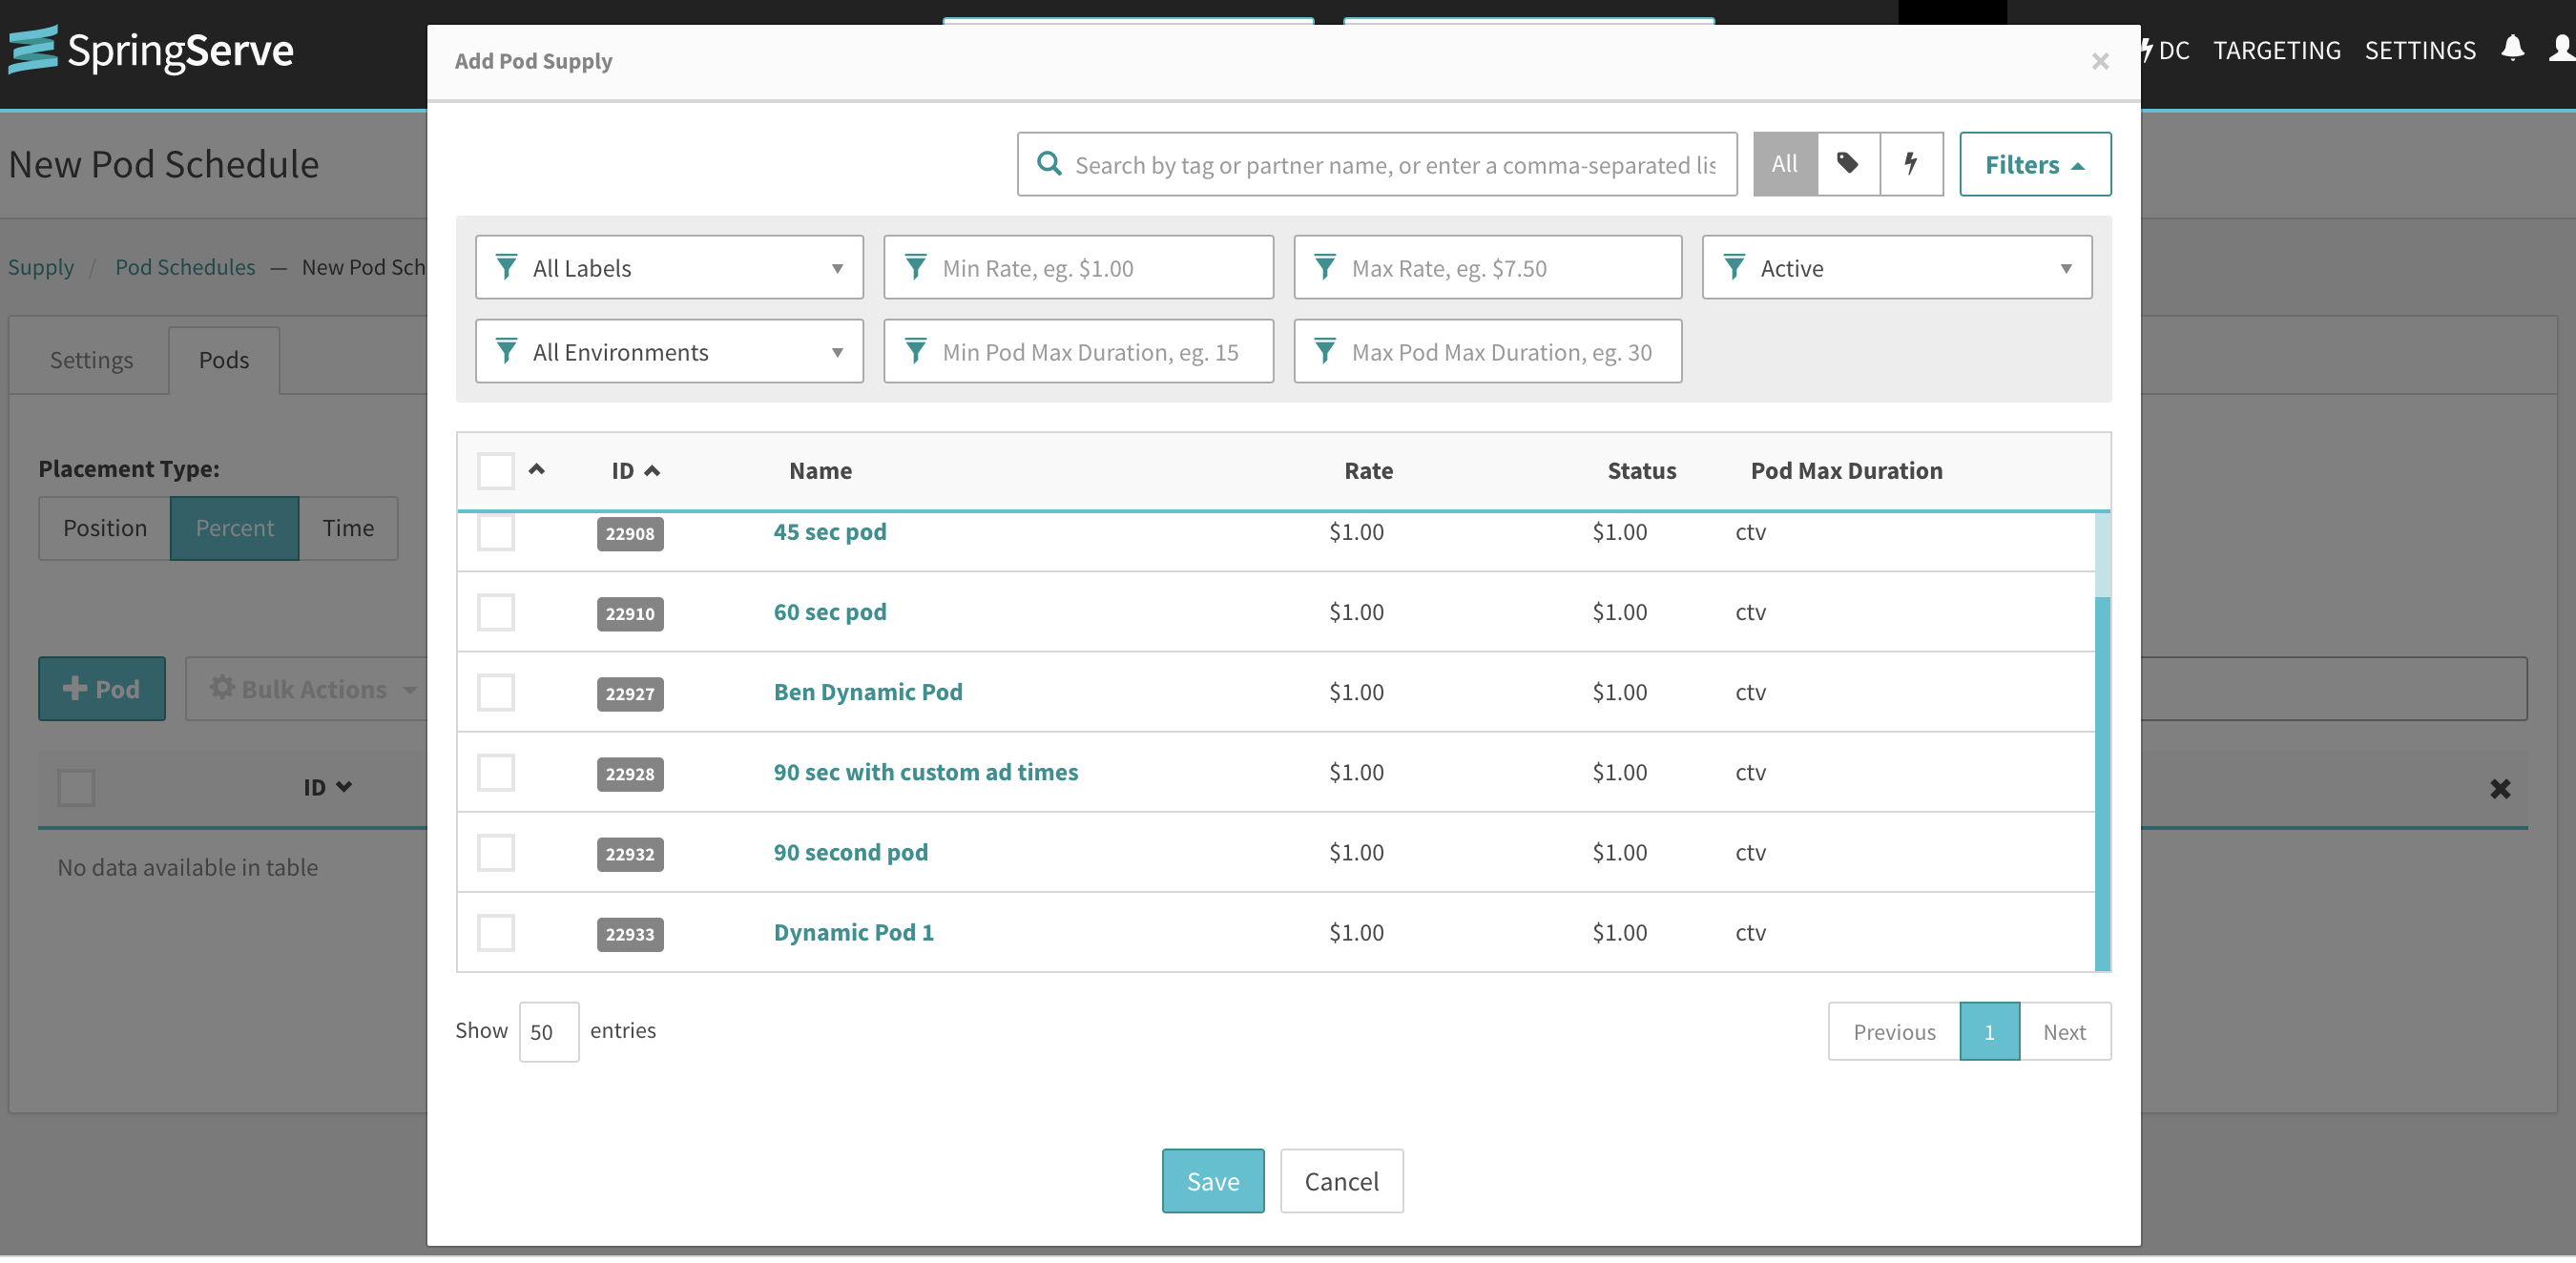
Click on the  button to bring up the schedule creation steps. The first tab – settings – simply requires a schedule name. The Pods tab is where you will select the type of schedule you want to create using either Percent or Time. Percent, allows you to set the ad placement within a specific percentage(s) of the content and Time allows you to set how far into the content the ad break should be by specific hour, minute, and seconds. In the Pods tab, click on the
  button to bring up the ad pods available for scheduling. If the list is long, narrow down your search by Managed or Direct connect, label, min and max rate, active/inactive, environment, and duration min/max.
After you have selected the pods that you would like to schedule, you could order them by the time or percentage. In this example of a time based schedule, the 60 sec pod will play 20 seconds into the content, Dynamic Pod 1 will display at 6 minutes and 46 seconds and the 90 second pod will display at 10 minutes and 6 seconds.

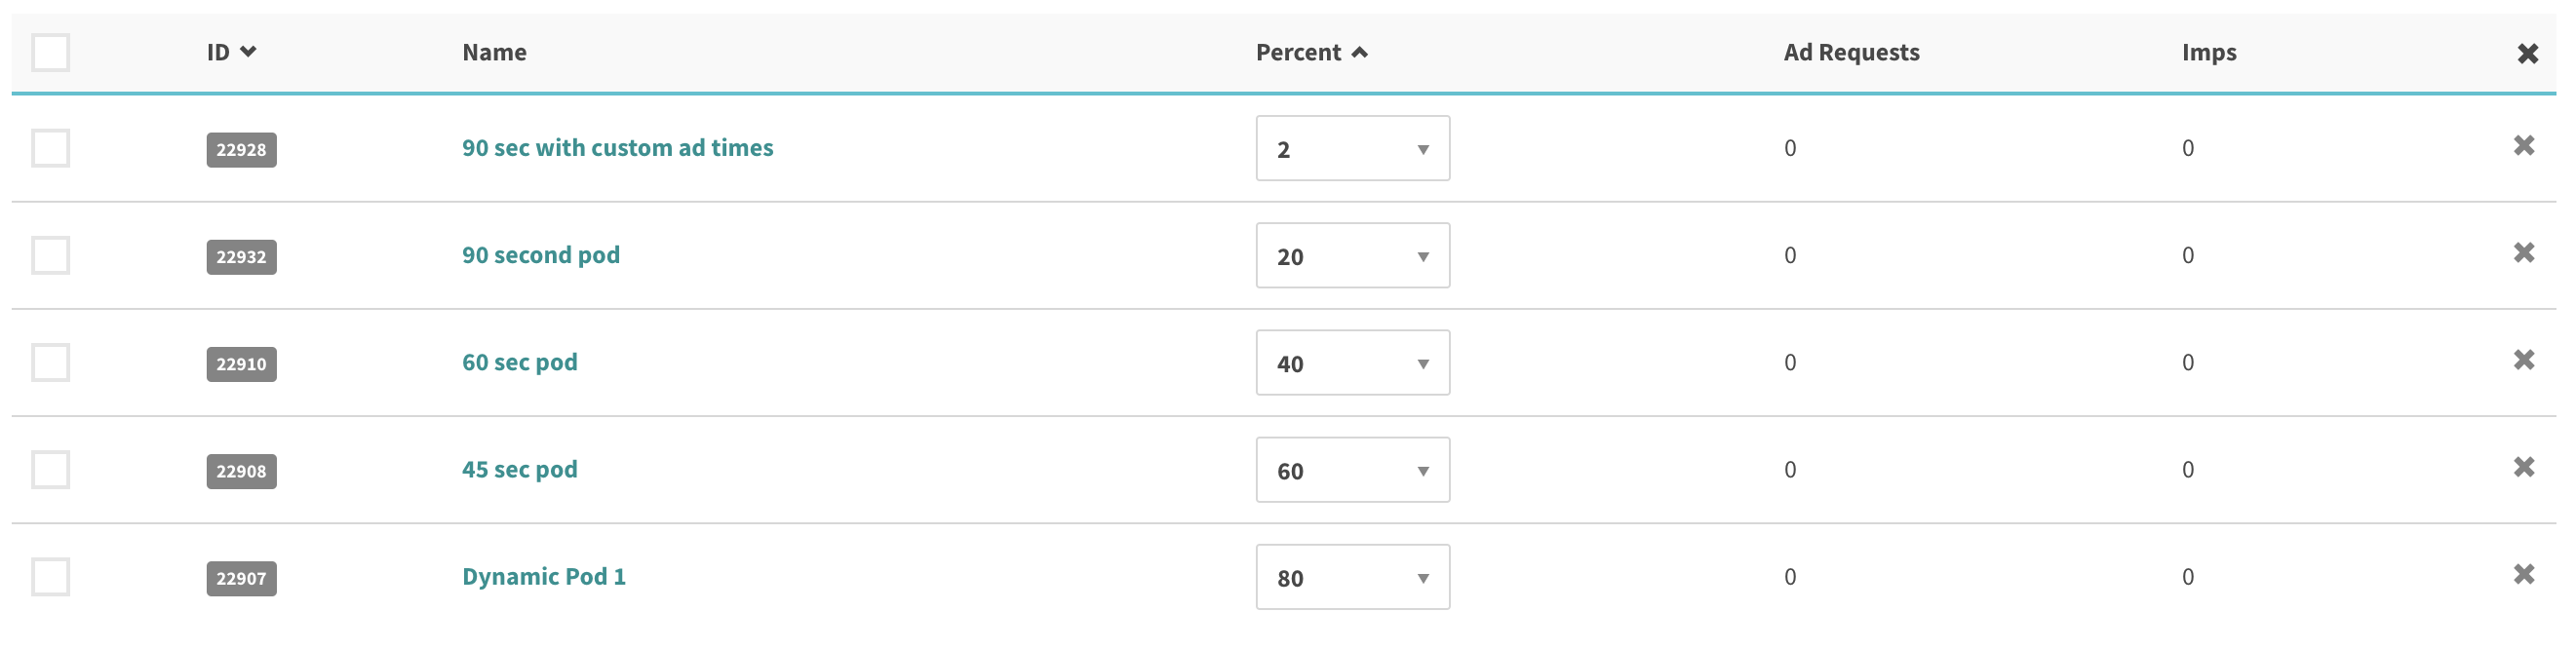
Additionally, if you are unsure of the length of content, you could schedule based on percentage of content:
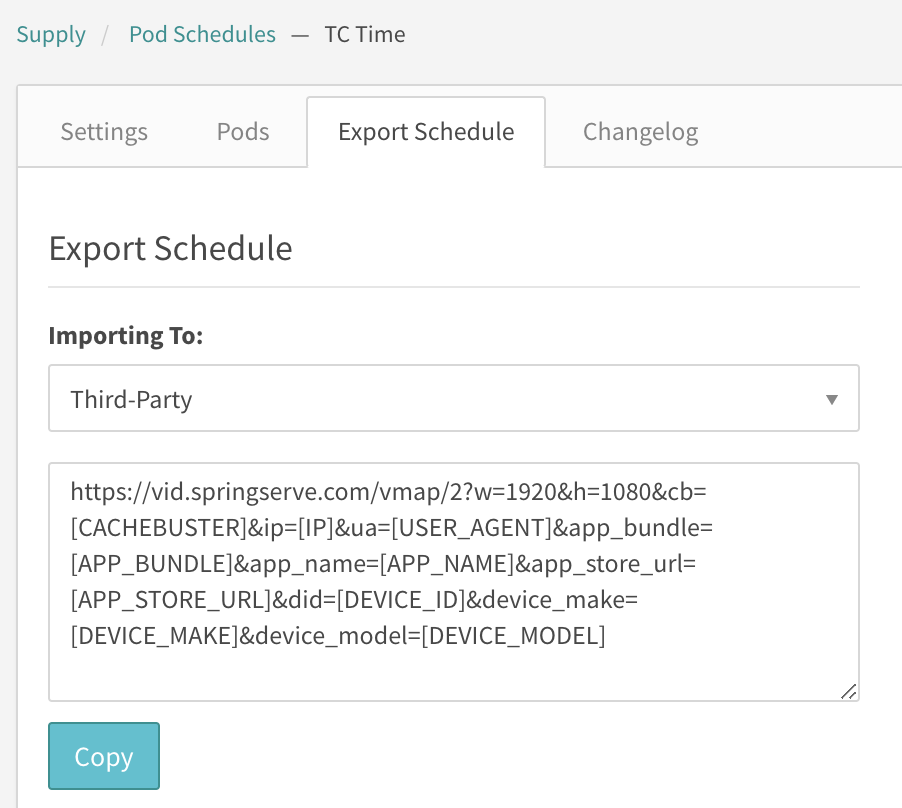
After you have placed the ad pods into the schedule and hit the apply button, it will generate a schedule tag in the 'Export Schedule' tab. The macros available to be placed in this tag function exactly the same way as a standard managed supply tag.
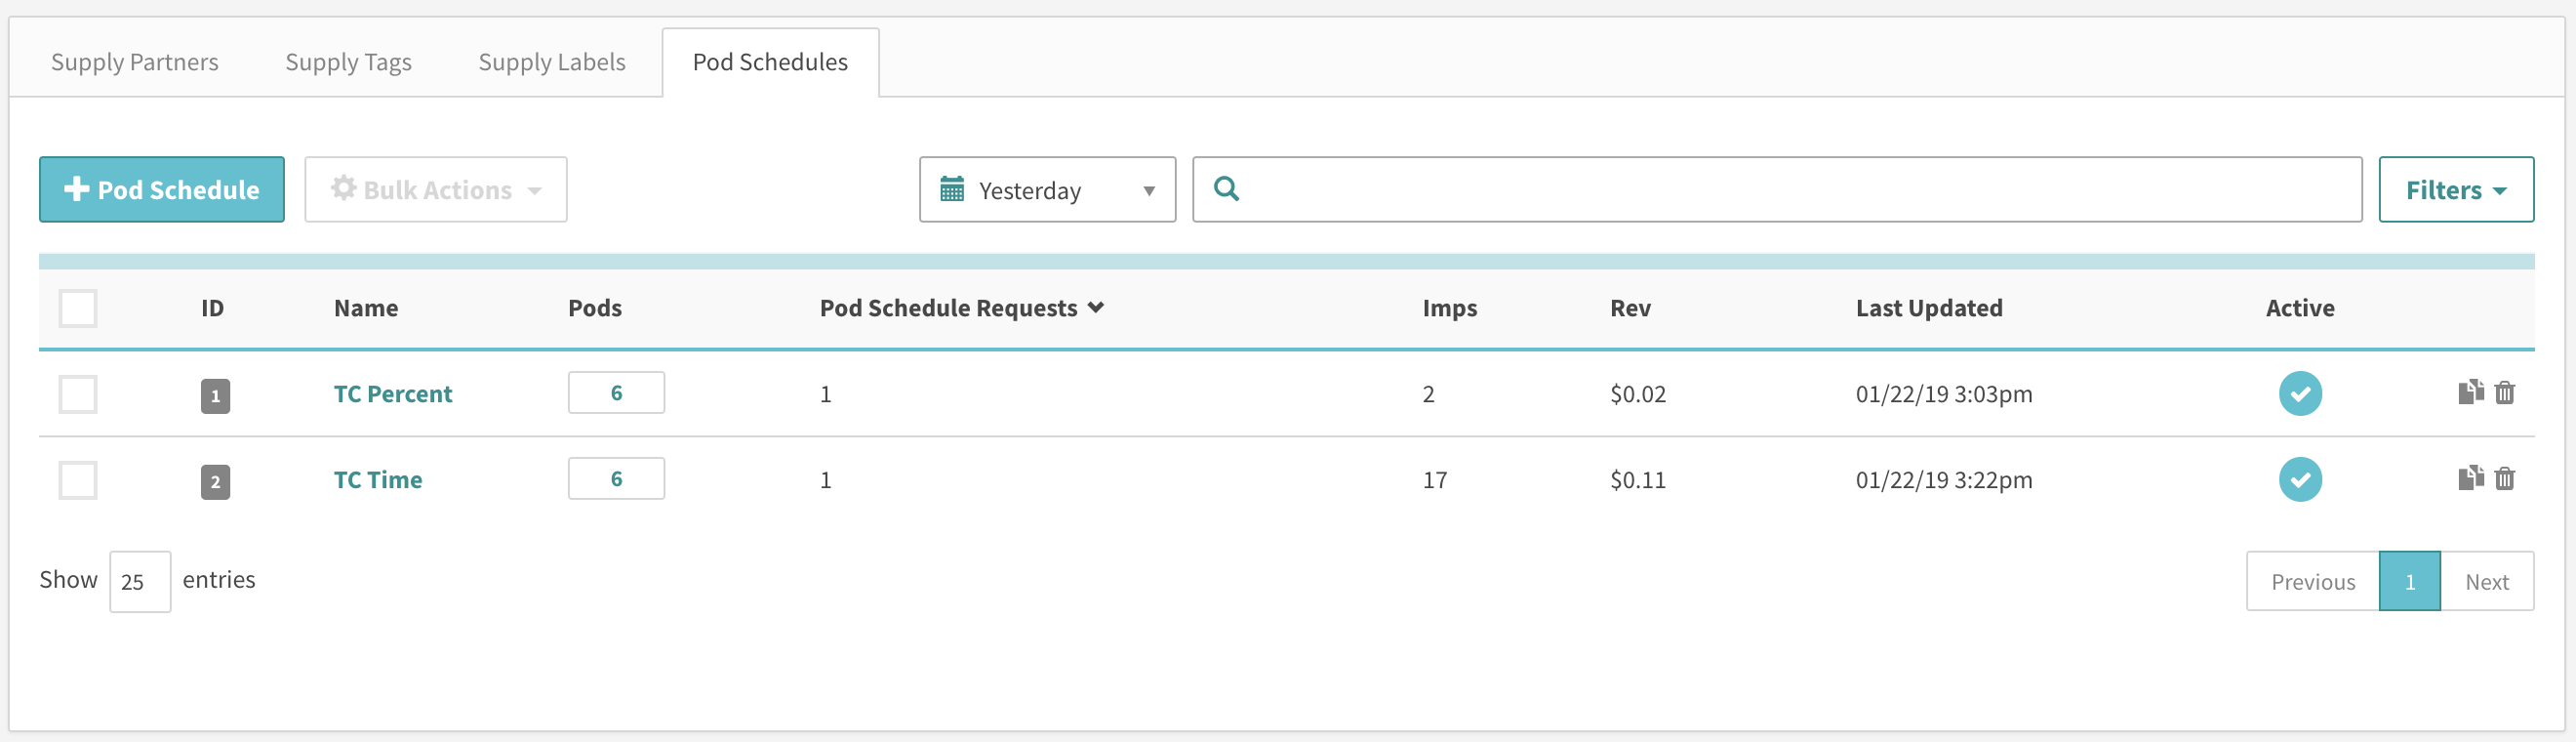
How do I know if VMAP is working?
Once you have placed your VMAP tags and set them live you will begin seeing requests to the pod schedule in the quick stats of the Pod Schedule Tab. A Pod schedule Request shows the number of times the VMAP tag was requested. The Imps in this tab show the total number of ad impressions that served for the VMAP request.